 EveryGen AI
GPT-Image-2 in Practice: Make an Infographic from One Prompt (Process + Comparison + Data + Diagram)
Make a process infographic with exact wording, a clear reading order, and consistent visual steps.
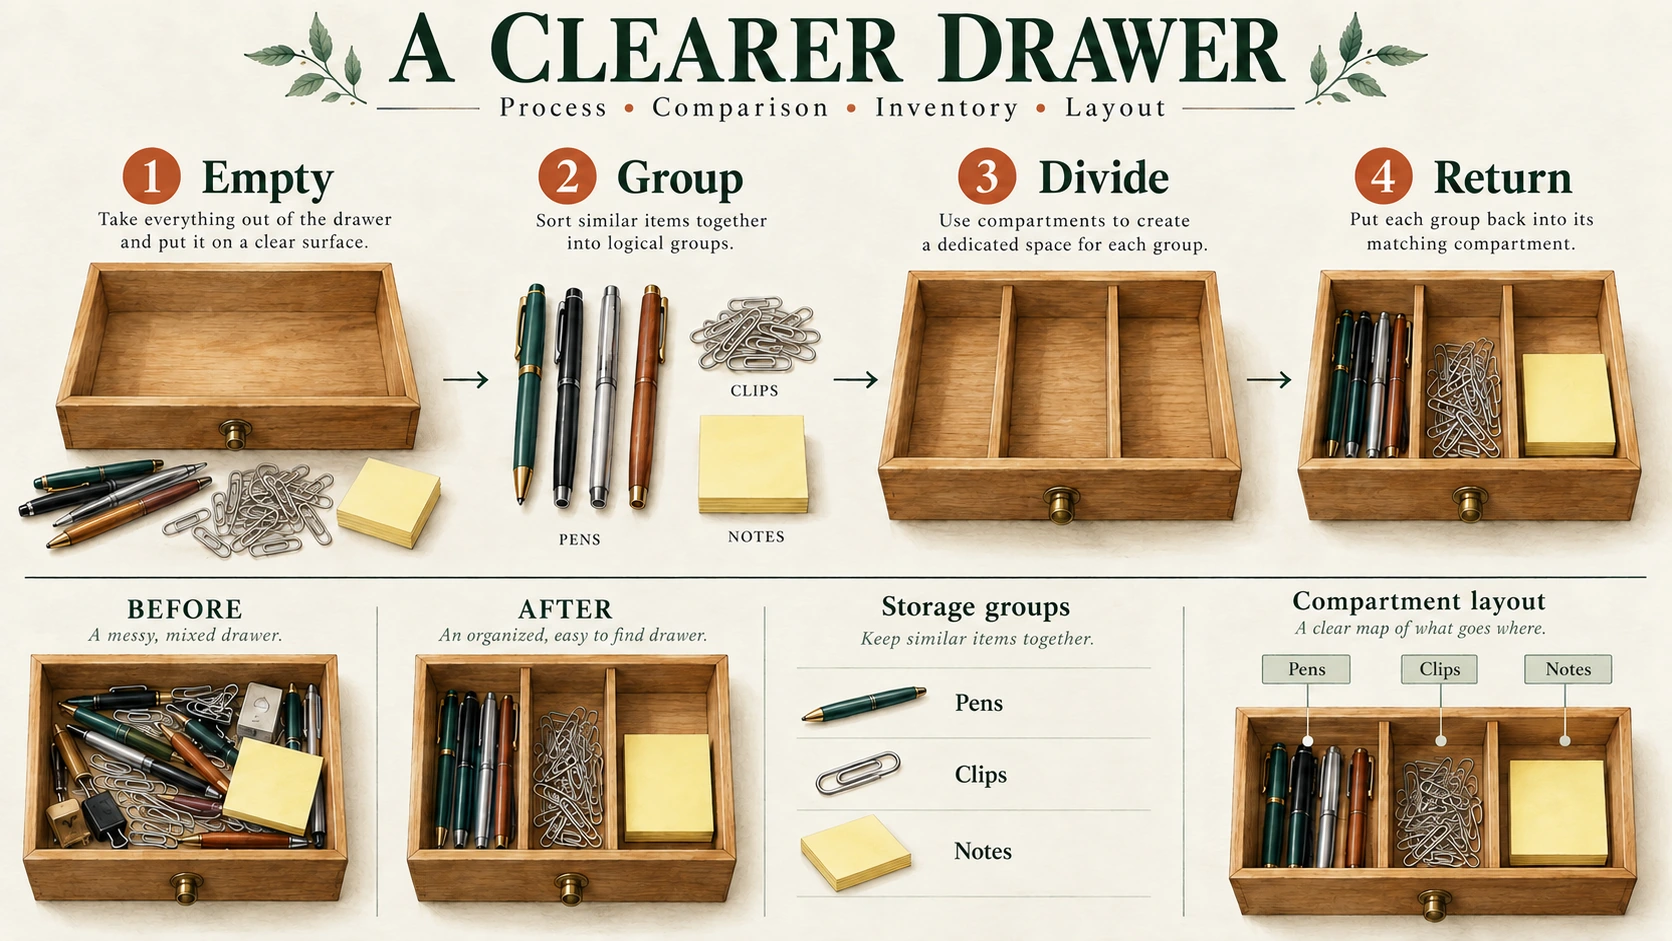
A process infographic needs more than readable words. Its arrows must show the right order, and each illustration must explain the action beside it. Correct spelling does not help if the diagram tells someone to return the items before adding the dividers.
This walkthrough turns a checked four-step outline—Organize a Desk Drawer—into a portrait infographic. You will prepare the content, generate a candidate with EveryGen AI, check four different kinds of accuracy, and correct problems before sharing the file.
Preview the intended result
The example uses four stacked cards, numbered 1–4, connected by three downward arrows. Each card contains a short instruction and an illustration of that stage.
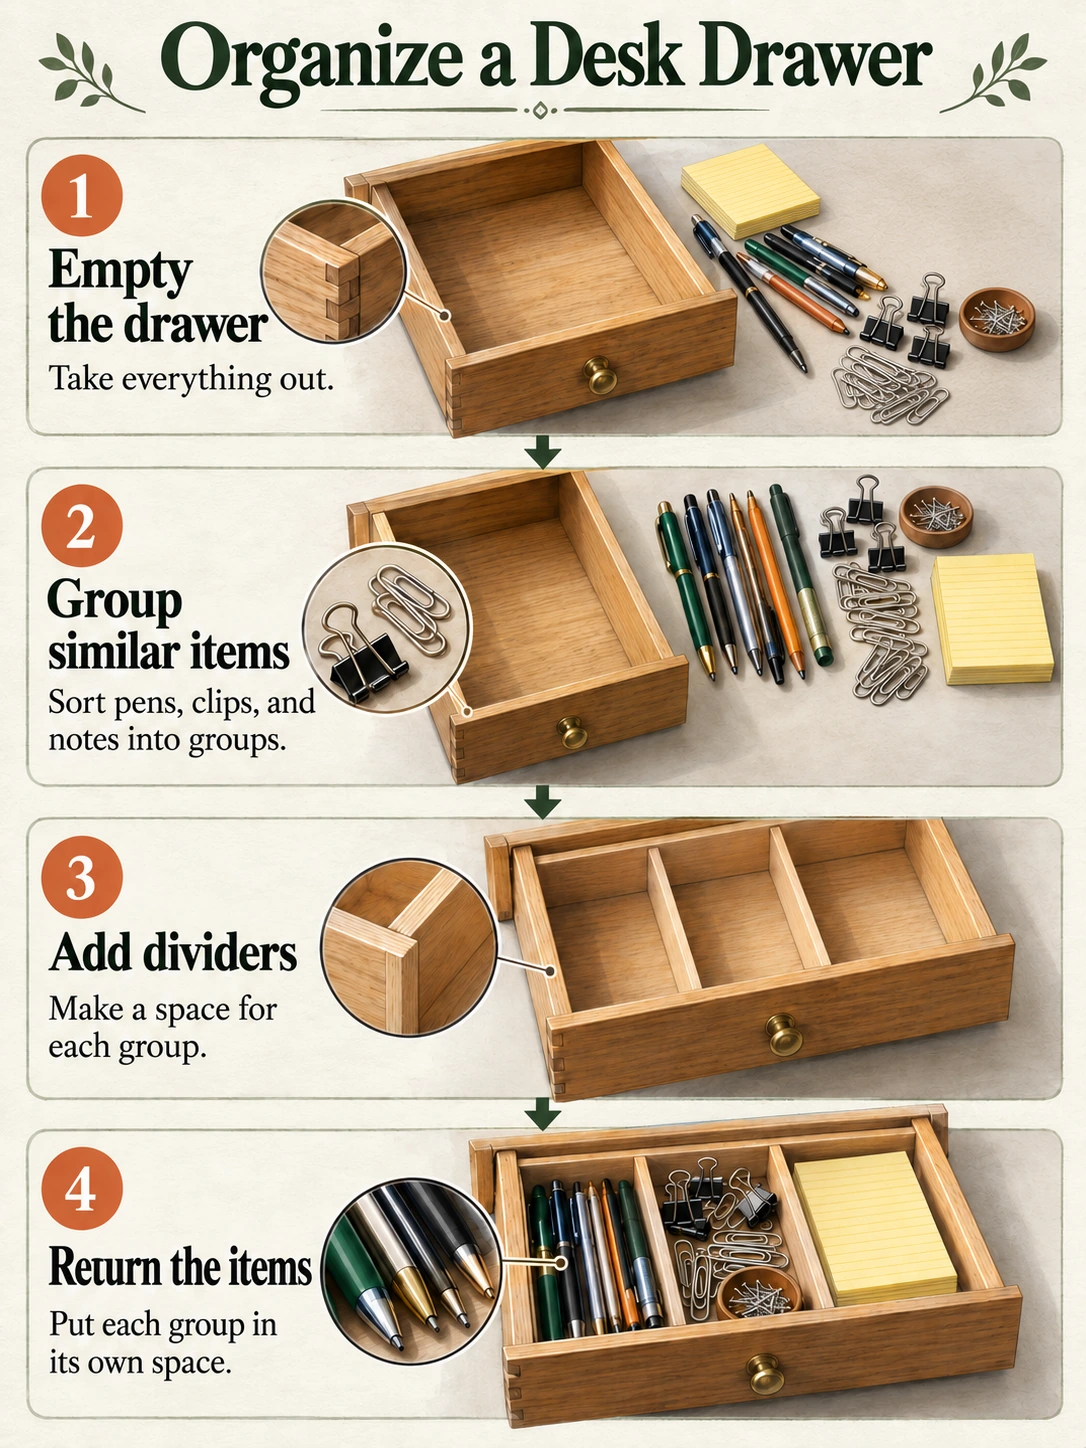
Codex-generated teaching illustration, not a EveryGen AI output. This is a static image, not a file with editable text, arrows, or cards.
The result you are aiming for is a checked explanation—not a statistical chart or a claim about how much time this routine saves.
1. Approve the content before designing the image
Keep the title and instructions in a separate text document. That document is the source of truth when you review generated wording.
Title: Organize a Desk Drawer
-
Empty the drawer
Take everything out. -
Group similar items
Sort pens, clips, and notes into groups. -
Add dividers
Make a space for each group. -
Return the items
Put each group in its own space.
Read these steps from top to bottom. This is one straightforward organizing method for the example, not a claim that every drawer needs the same arrangement.
Check the process before styling it. The items come out first, then form three groups. The empty drawer receives dividers before the groups go back inside. The numbers describe sequence; they are not data points.
The illustrations need to distinguish those states:
| Card | What the illustration should show |
|---|---|
| 1 | An empty drawer, with the removed items outside it |
| 2 | Pens, clips, and notes separated into three groups |
| 3 | An empty drawer divided into three spaces |
| 4 | Each group placed in its corresponding space |
Do not let the third illustration show a fully stocked drawer. That would illustrate the result of Step 4 rather than the action in Step 3.
Give the sequence a simple layout
Use one vertical column rather than a circular or branching diagram. Leave room for the short sentences and place each illustration in a separate area so objects do not interfere with the lettering.
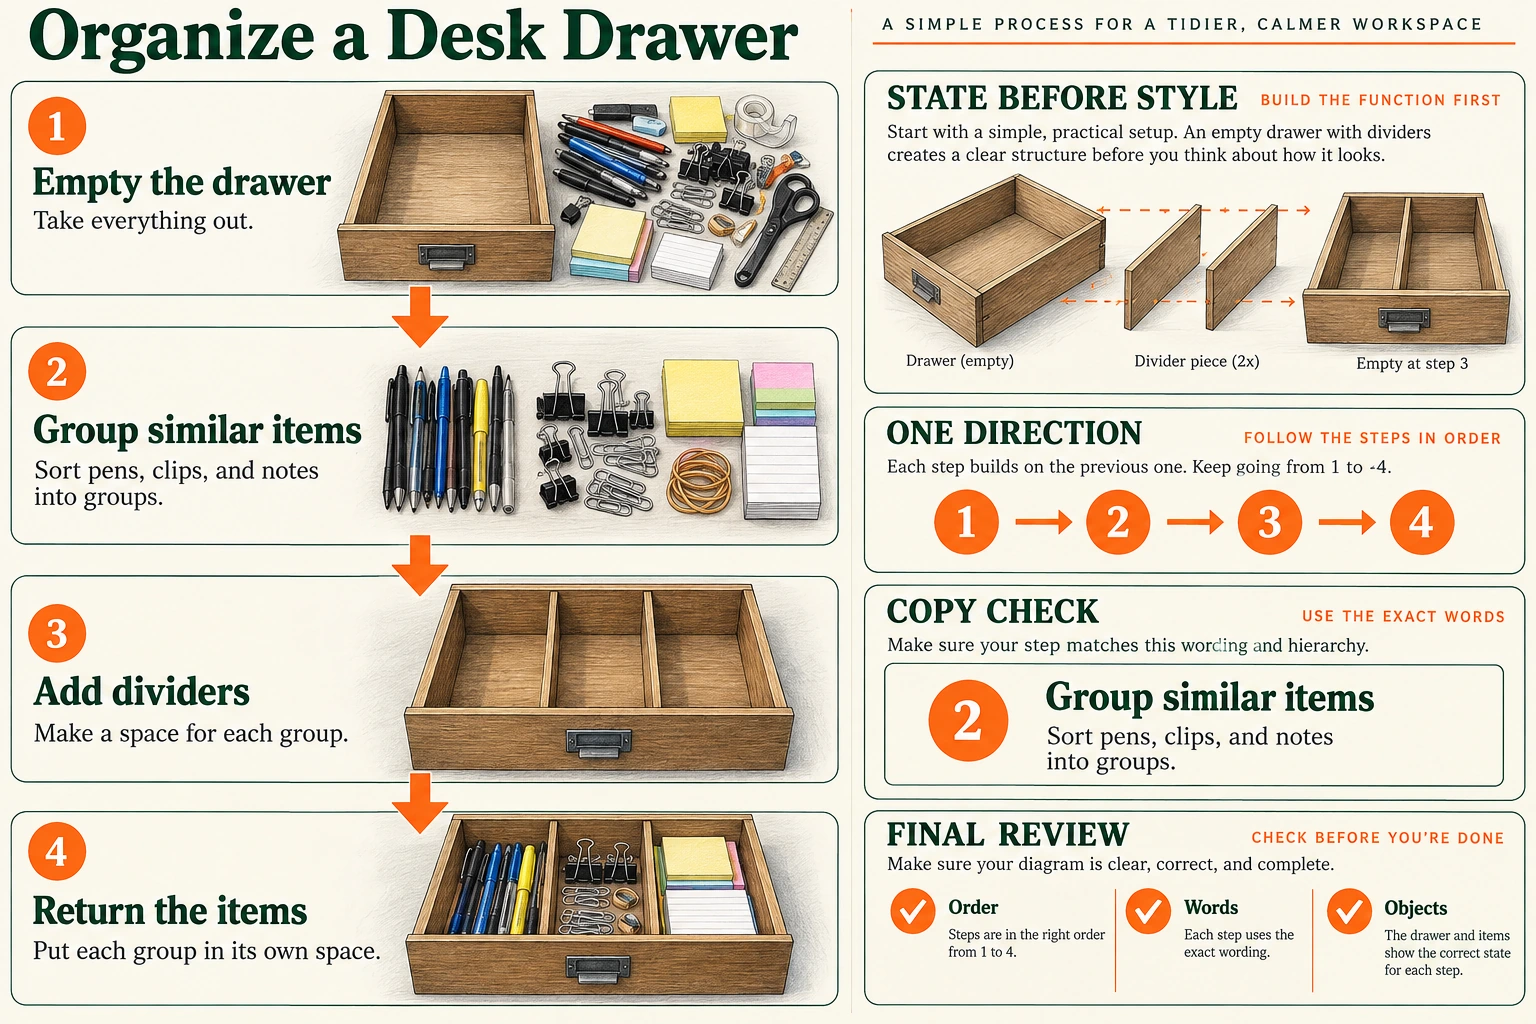
Codex-generated planning plate. It makes the empty-to-filled state changes, reading direction, and review criteria visible; it is not an editable template or a EveryGen AI output.
The planning plate explains the arrangement. You do not need to generate or upload it to follow the text-to-image workflow below.
2. Copy a prompt that specifies the words, relationships, and pictures
This prompt requests the finished infographic directly. It separates the exact text from the visual instructions.
Create one static process infographic on a 3:4 portrait canvas.

Purpose:
Explain a simple four-step method for organizing a desk drawer.
Use the supplied instructions without adding statistics, time estimates, productivity claims, or extra advice.

Place this exact title at the top:
Organize a Desk Drawer

Layout:
Create exactly four cards in one vertical column.
Keep the cards equal in width, with consistent margins and spacing.
Number them 1, 2, 3, and 4 from top to bottom.
Each card must contain its number, exact heading, exact short sentence, and a separate illustration area.

Connect the cards with exactly three downward arrows:
Card 1 to Card 2.
Card 2 to Card 3.
Card 3 to Card 4.

Do not add upward arrows, branches, loops, or an arrow after Card 4.

CARD 1
Number: 1
Heading: Empty the drawer
Sentence: Take everything out.
Illustration: Show an empty desk drawer with the removed pens, clips, and notes outside it on the nearby surface. The drawer interior must be empty.

CARD 2
Number: 2
Heading: Group similar items
Sentence: Sort pens, clips, and notes into groups.
Illustration: Show the pens, clips, and notes separated into three distinct groups on a surface. Do not show everything already placed inside a finished drawer.

CARD 3
Number: 3
Heading: Add dividers
Sentence: Make a space for each group.
Illustration: Show the same drawer with dividers creating three empty spaces. Do not put stationery into these spaces yet.

CARD 4
Number: 4
Heading: Return the items
Sentence: Put each group in its own space.
Illustration: Show the divided drawer with pens in one space, clips in another, and notes in the third.

Visual treatment:
Use realistic-looking color illustrations of the drawer and stationery.
Keep the drawer design and the appearance of the item groups consistent across the cards.
Use a plain light background, dark readable text, and restrained color accents.
Keep all illustrations separate from the text.
Make the title most prominent, followed by the step headings and then the short sentences.

Text requirements:
Render the title and each supplied heading and sentence exactly once.
Preserve capitalization and punctuation.
Render each card number once.
Do not print the words Number, Heading, Sentence, Illustration, or CARD.
Do not add labels inside the illustrations.

Exclusions:
No additional steps, charts, percentages, decorative badges, logos, or background scenes.
No cropped words or illustrations.
No alternate layouts or side-by-side versions.
The prompt defines what to inspect. It does not guarantee that every word, arrow, or illustrated state will be correct.
3. Generate a candidate in EveryGen AI
Open EveryGen AI to turn a checked outline into a process image.
The checked interface starts with Text to Image, GPT Image 2, 1:1, 1K, JPEG, and x1. For this example, open the settings and change the aspect ratio from 1:1 to 3:4.
| Setting | Choice for this infographic |
|---|---|
| Mode | Text to Image |
| Model | GPT Image 2 |
| Aspect ratio | 3:4 portrait |
| Resolution preset | 1K |
| Output format | JPEG |
| Output count | x1 |
Paste the complete prompt, confirm the settings, and submit when ready. Save the candidate you intend to inspect, along with its prompt and settings.
The two illustrations in this article are separate teaching assets. They do not indicate a PNG export option in the JPEG workflow described here.
Start by checking the candidate’s content. Increasing resolution is not a correction for a missing sentence or an arrow pointing the wrong way.
4. Check four things separately
Open the downloaded file rather than relying only on a small preview.
Text: compare every line with the approved copy
Check the main title, four step titles, four short sentences, and the numbers 1–4.
Read the smaller sentences slowly. Confirm the commas in Sort pens, clips, and notes into groups. and the final periods in all four sentences. Look for duplicated words, missing letters, and invented captions.
Do not change your approved text merely to match an incorrect image.
Flow: follow every connection
Start at Card 1 and trace the arrows:
1 → 2 → 3 → 4
There should be three arrows, all pointing downward between adjacent cards. An upward connector, an arrow skipping Card 2, or a loop from Card 4 back to Card 1 changes the process.
Check the physical card order as well as the labels. Renumbering an incorrectly arranged set of illustrations does not necessarily fix the explanation.
Pictures: verify the action in each card
Compare each illustration with the state table in Step 1.
The first drawer should be empty. The second card should show three groups outside the drawer. The third should show empty divided spaces. Only the fourth should show the groups returned to those spaces.
Look for contradictions such as stationery already inside the Step 3 drawer, mixed items in the final compartments, or an illustration paired with the wrong heading.
The pictures should explain the instructions, not merely repeat a decorative image of a tidy drawer.
Display size: inspect the actual reading experience
Check at 100% zoom, then place the image at the width it will occupy on your page or slide. Review the smaller sentences at that size.
If the body copy is difficult to read, give it more space and reduce decorative detail. Do not judge readability only while viewing an enlarged crop.
Repeat these checks after any export, resizing, or correction that changes the final file.
5. Revise one identified problem
Keep the original candidate before editing. Switch to Image to Image, upload your saved candidate, and confirm the intended ratio and output settings.
The separate editing entry also lets you revise the flow from your saved candidate. Use your actual file as the reference; the teaching images are not a record of your generation.
For example, when the connector between Cards 2 and 3 points upward, use a focused request:
Edit the uploaded drawer-organizing infographic.

Correct the connector between Card 2 and Card 3 so that it points downward from Card 2 to Card 3.

Keep exactly three downward arrows connecting 1 to 2, 2 to 3, and 3 to 4.
Do not add a loop or an arrow after Card 4.

Preserve the title, all four numbered cards, their exact headings and sentences, and their illustrations.
Keep the original 3:4 layout.
This expresses the intended change; it does not lock the rest of the image. Recheck the text, pictures, and other arrows after the revision.
Use a different correction for a different problem:
| Problem | Next action |
|---|---|
| A sentence is misspelled or rewritten. | Request replacement with the exact approved sentence. If it remains incorrect, rebuild that text externally. |
| Card 3 contains stationery. | Request an empty three-compartment drawer in Card 3, retaining the filled drawer only in Card 4. |
| A step is missing or the order has changed. | Return to the approved four-step outline. Correct the structure before adjusting colors or decoration. |
| The revision fixes one arrow but alters other content. | Reject it and return to the saved candidate. Do not continue from a version with newly introduced errors. |
| Text remains too small. | Allocate more space to the copy and simplify the pictures, or rebuild the layout with editable elements. |
These are correction routes, not promises that a particular request will succeed.
Rebuild precise elements externally when necessary
When repeated revisions do not produce reliable text or connections, use an external editor to replace them with real text and shapes. Remove the incorrect lettering or arrow first; do not leave it visible beneath a second version.
For a fully editable alternative, you can build editable process boxes in SmartArt. Microsoft’s instructions cover entering text and adding, deleting, or moving boxes. Recreate the four-step structure from the approved copy and check the resulting reading order.
That is a separate rebuilding workflow—not a hidden EveryGen AI text-layer feature. Treat the generated JPEG as an image reference, not as four already-editable process cards.
6. Deliver the image with its instructions
Reopen the exact file you plan to share. Confirm that its dimensions and crop suit the destination and that the latest version passes all four checks: wording, sequence, illustrated actions, and readability.
Keep the image alongside the approved text. When publishing it on a webpage, include the four numbered instructions as ordinary page text, as shown near the beginning of this article, and explain that the sequence runs from top to bottom.
W3C guidance on explaining complex images describes pairing a short identification of the image with a fuller text explanation of its essential information. For this infographic, that includes the instructions and their order—not just an alt description saying “drawer infographic.”
Save the checked image, the final copy, and any editable source created during external repair. Label earlier candidates separately so an unchecked version is not shared by mistake.
The infographic is ready when someone can follow the same four-step method from either the picture or the accompanying text, without guessing the order or overlooking a contradiction.
Extend the same brief to comparison, data, and diagram layouts
Choose the form that matches what the reader needs to understand:
| Purpose | Useful layout | What to check |
|---|---|---|
| Process | Four ordered stages | State changes and arrow direction |
| Comparison | Matching before/after views | Same camera, scale, and subject |
| Data | Labeled bars or a simple table | Verified values, units, totals, and proportional scales |
| Diagram | Overhead compartments or an exploded divider | Parts, labels, and physical relationships |
For a data graphic, provide the exact dataset in the prompt and independently check the output. Do not infer counts from decorative piles of stationery. The cover's storage groups classify objects; they are not measured quantities or a claim about productivity.
A more detailed illustration helps when it shows how the object is assembled or how its state changes. Detail that obscures the order or introduces unsupported statistics makes the explanation worse.