 EveryGen AI
GPT-Image-2 in Practice: Build a Xiaohongshu Grid Post in 3 Steps (Auto-Splitting Included)
Build a six-page Xiaohongshu post one image at a time, keeping copy, layout, and visual identity consistent.
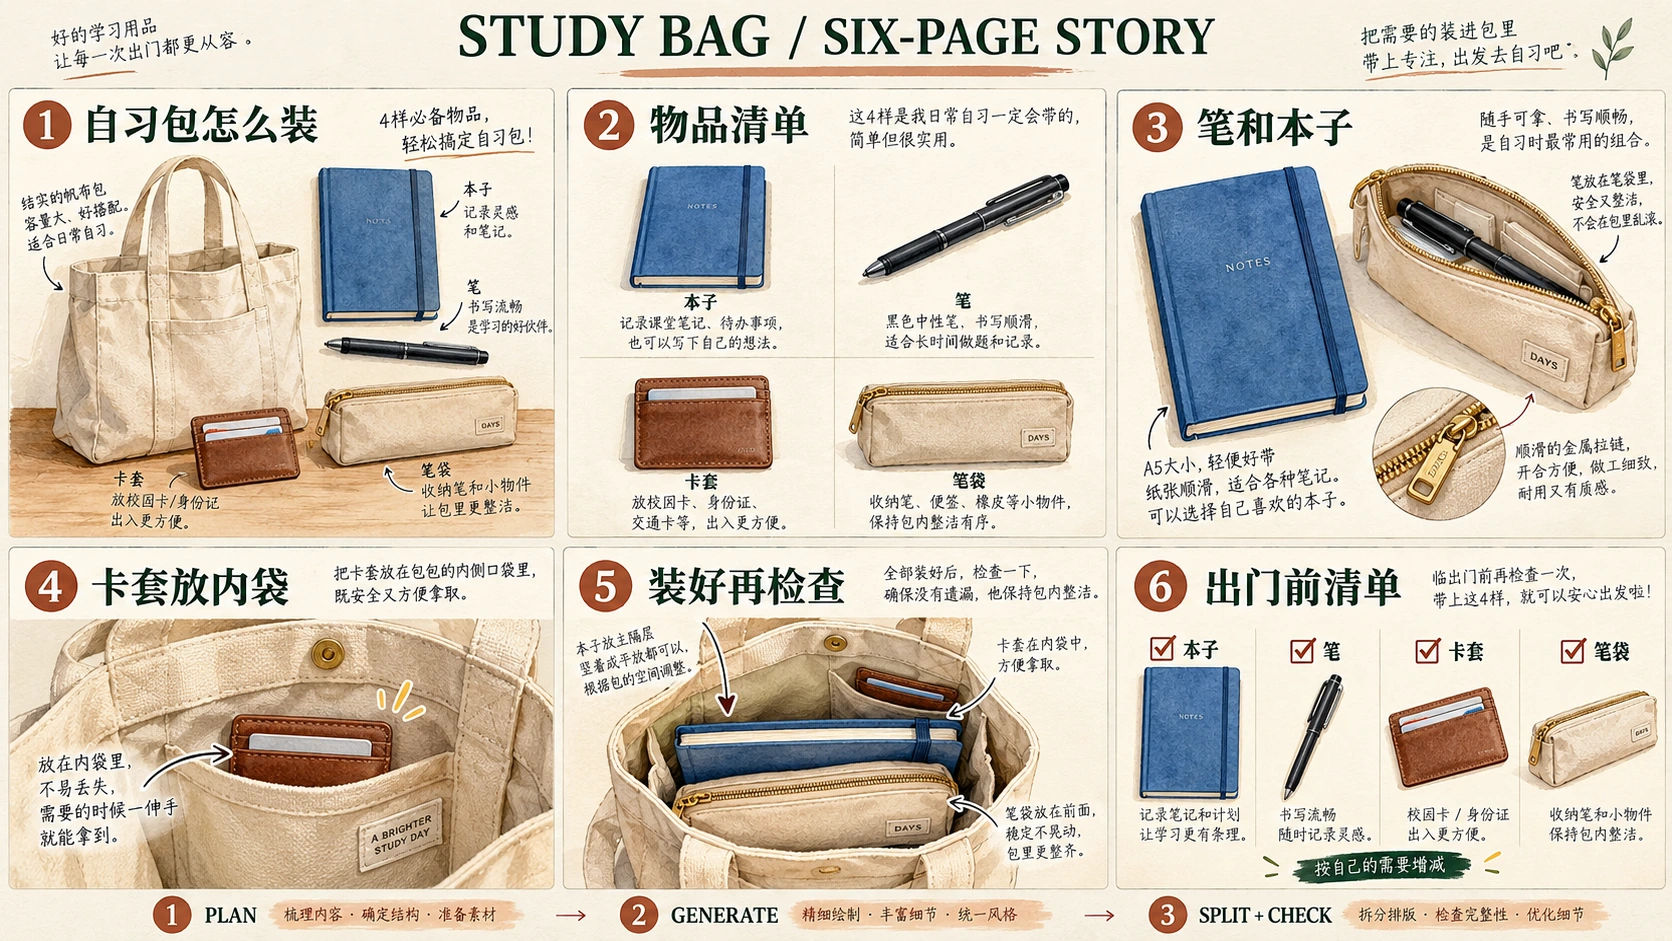
A useful multi-image post needs more than six attractive pictures. Each page should add information, the objects should remain recognizable, and the finished files should appear in the intended order.
This walkthrough creates a six-page Chinese-language explainer about packing a study bag: 自习包怎么装. You will plan the sequence, generate one page at a time, check the pictures and copy, and assemble six independent files for later platform preview.
The six illustrations are Codex-generated teaching images, not EveryGen AI test outputs, photographs of real products, or evidence of a bag-capacity test.
1. Give each page a different job
Start with a page plan rather than asking for “six matching social posts.”
Canva’s guidance helps you plan the text and images for a Rednote post by distinguishing a cover that summarizes the content from interior pages with different combinations of pictures and text. For this example, use that distinction to move from an overview to specific placement decisions, then finish with a checklist.
Keep the following copy in a separate document:
| Page | Exact heading | Exact supporting text | Page’s job |
|---|---|---|---|
| 01 | 自习包怎么装 | 四件小物,按位置整理 | Introduce the bag and its four contents. |
| 02 | 先摊开看 | 本子、笔、卡套、笔袋 | Identify the four items before packing. |
| 03 | 笔和本子先配好 | 把笔收入笔袋 | Show where the pen goes. |
| 04 | 卡套留在好拿处 | 放进内袋,方便取用 | Explain the cardholder’s location. |
| 05 | 装好后的样子 | 本子和笔袋放主袋,卡套放内袋 | Show the packed arrangement. |
| 06 | 出门前再核对 | Checklist: 本子, 笔, 卡套, 笔袋 · Footer: 按自己的需要增减 | Provide a final inventory to review. |
The page numbers are part of the artwork: retain the leading zero in 01 through 06.
Define the objects once
Use one beige canvas tote with two handles and one inner pocket. Its four contents are one blue notebook, one black pen, one plain brown cardholder, and one beige zippered pencil pouch.
The bag is the container, not a fifth checklist item. The cardholder should have no personal details or invented identification numbers.
Keep the object designs consistent, but do not force every item to appear on every page. A close-up of the inner pocket does not need to show the notebook. A pen inside a closed pouch should not also appear loose beside it.
2. Set up one portrait page in EveryGen AI
Open EveryGen AI to design one page of a social carousel.
Begin in Text to Image with GPT Image 2. Change the default 1:1 aspect ratio to 3:4, then use the following starting settings:
| Setting | Choice for this example |
|---|---|
| Mode | Text to Image |
| Model | GPT Image 2 |
| Aspect ratio | 3:4 portrait |
| Resolution preset | 1K |
| Output format | JPEG |
| Output count | x1 |
3:4 is this example’s design choice, not a claim about a mandatory Xiaohongshu format.
The x1 setting requests one output image. It does not generate six separate pages, assign their order, or publish them. Repeat the page-making process with a different page brief for each image.
The teaching images are separate editorial assets. Their displayed dimensions and file format do not define the output dimensions or export options of the generation workflow.
3. Combine one shared prompt with one page brief
Use the shared prompt below for the common visual rules. Append exactly one of the page briefs in the next section.
For the independent-page workflow, submit one brief at a time. The optional grid workflow below uses all six briefs with explicit equal-cell instructions, then splits the resulting sheet outside EveryGen AI.
Create exactly one standalone 3:4 portrait page for a Chinese-language illustrated study-bag explainer.

This request is for the single page described in the page brief appended below.
Do not generate the whole series, a collage of pages, or multiple alternative designs.

Shared visual style:
Use a milky off-white background, dark-green headings, and soft watercolor-style illustrations.
Keep the page clean, with generous outer margins and clear separation between text and pictures.
Make the heading prominent and the supporting text readable.
Show the two-digit page number once in a consistent, unobtrusive position.
Keep the page flat, without a phone frame or perspective mockup.

Shared object designs:
- One beige canvas tote with two handles and one inner pocket.
- One blue notebook.
- One black pen.
- One plain brown cardholder with no text or personal information.
- One beige zippered pencil pouch.

Show only the objects and object states requested in the appended page brief.
Do not add duplicates merely to make hidden contents visible.
Keep the colors, shapes, and bag construction consistent wherever they are shown.

Text:
Render only the exact Chinese text and page number supplied in the appended brief.
Preserve every character and punctuation mark.
Do not translate the copy or add English captions.
Do not print instruction labels such as Heading, Page number, or Supporting text.
Keep all lettering away from the page edges and illustration details.

If a reference image is attached:
Use it to guide the object designs, colors, and illustration style.
Replace its old copy and composition with the new page brief.
Do not carry over a previous page number or heading.

Exclusions:
No people, hands, brands, prices, capacity measurements, testimonials, engagement claims, or extra stationery. Small material-detail insets may magnify existing objects without adding new inventory.
Do not portray the illustration as a photograph or a tested product arrangement.
Submit the combined prompt for one page, then save and inspect the candidate before moving on. The shared instructions define what to check; they do not guarantee exact text or object consistency.
4. Build the six pages in order
Page 01: introduce the topic and inventory
Append this brief to the shared prompt:
Page number:
01

Heading:
自习包怎么装

Supporting text:
四件小物,按位置整理

Illustration:
Show the beige canvas tote with two handles and its single inner pocket.
Outside the bag, arrange exactly four separate items:
one blue notebook, one black pen, one plain brown cardholder, and one beige zippered pencil pouch.

Keep the items identifiable and distinct from one another.
Use a cover composition with enough space for the heading and short supporting text.
Do not put duplicate contents inside the bag.
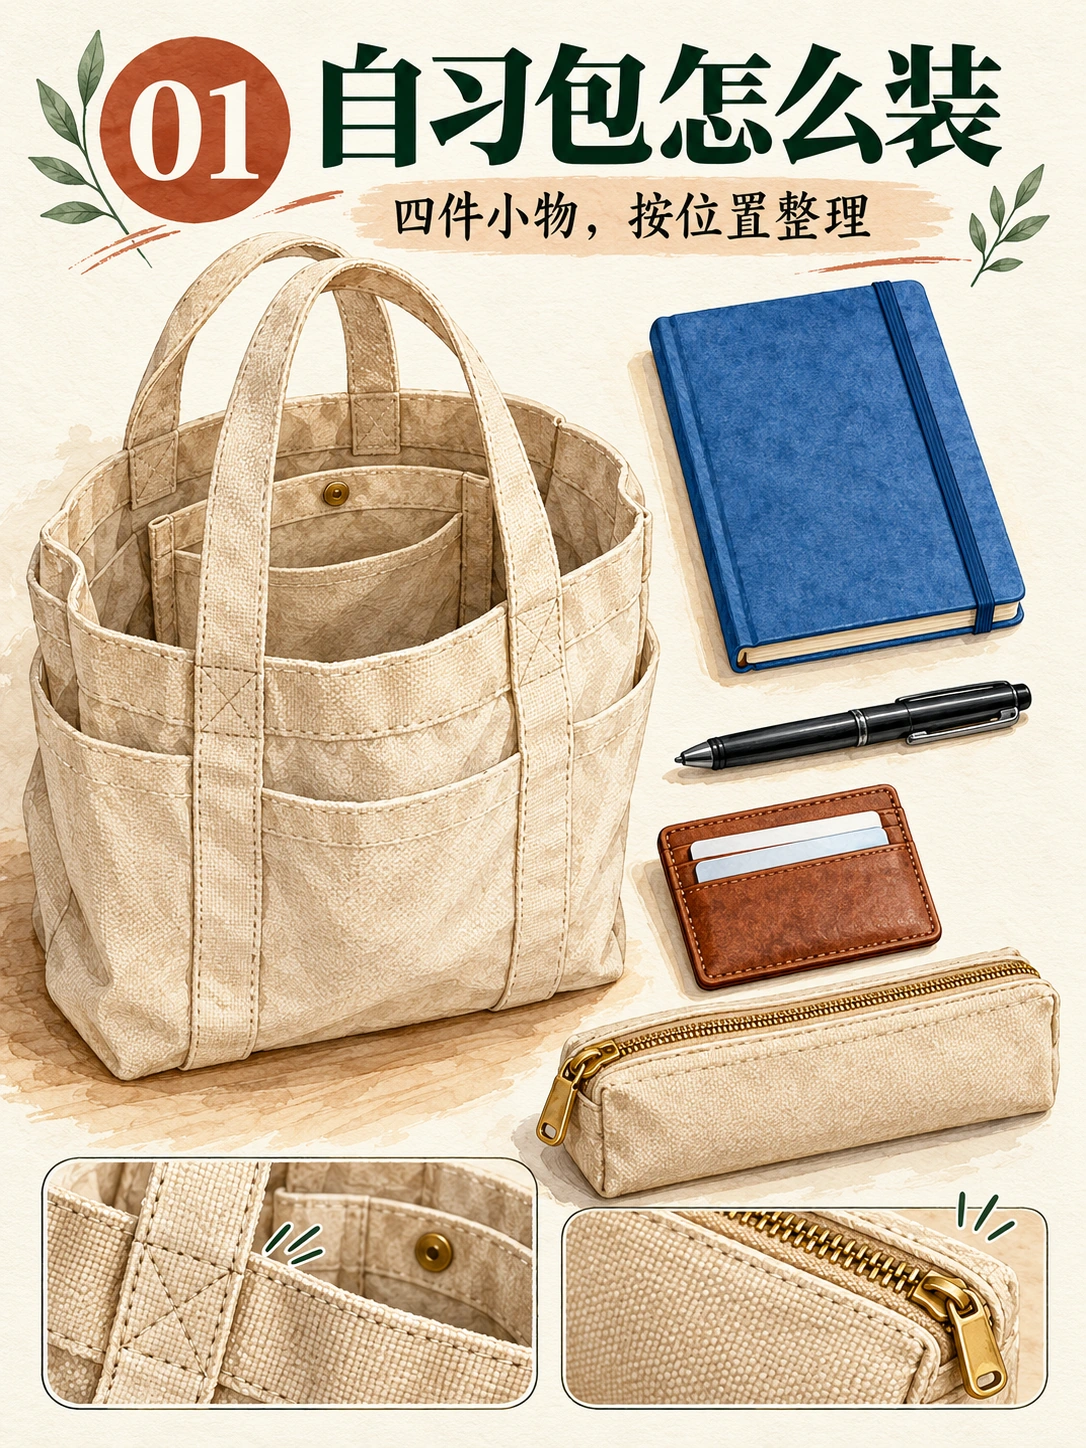
Codex-generated teaching page 01. The cover establishes the container and four-item inventory.
Check the two handles, the inner-pocket construction, and the four separate contents. This is the first useful visual reference for later pages, so do not approve a bag design you already know is wrong.
Page 02: separate the four items
Append this brief:
Page number:
02

Heading:
先摊开看

Supporting text:
本子、笔、卡套、笔袋

Illustration:
Show exactly four objects in a spacious 2-by-2 flat lay:
one blue notebook, one black pen, one plain brown cardholder, and one beige zippered pencil pouch.

Keep each object separate and fully recognizable.
Use the same object designs established for the series.
Do not show the tote, duplicate items, or add individual text labels.
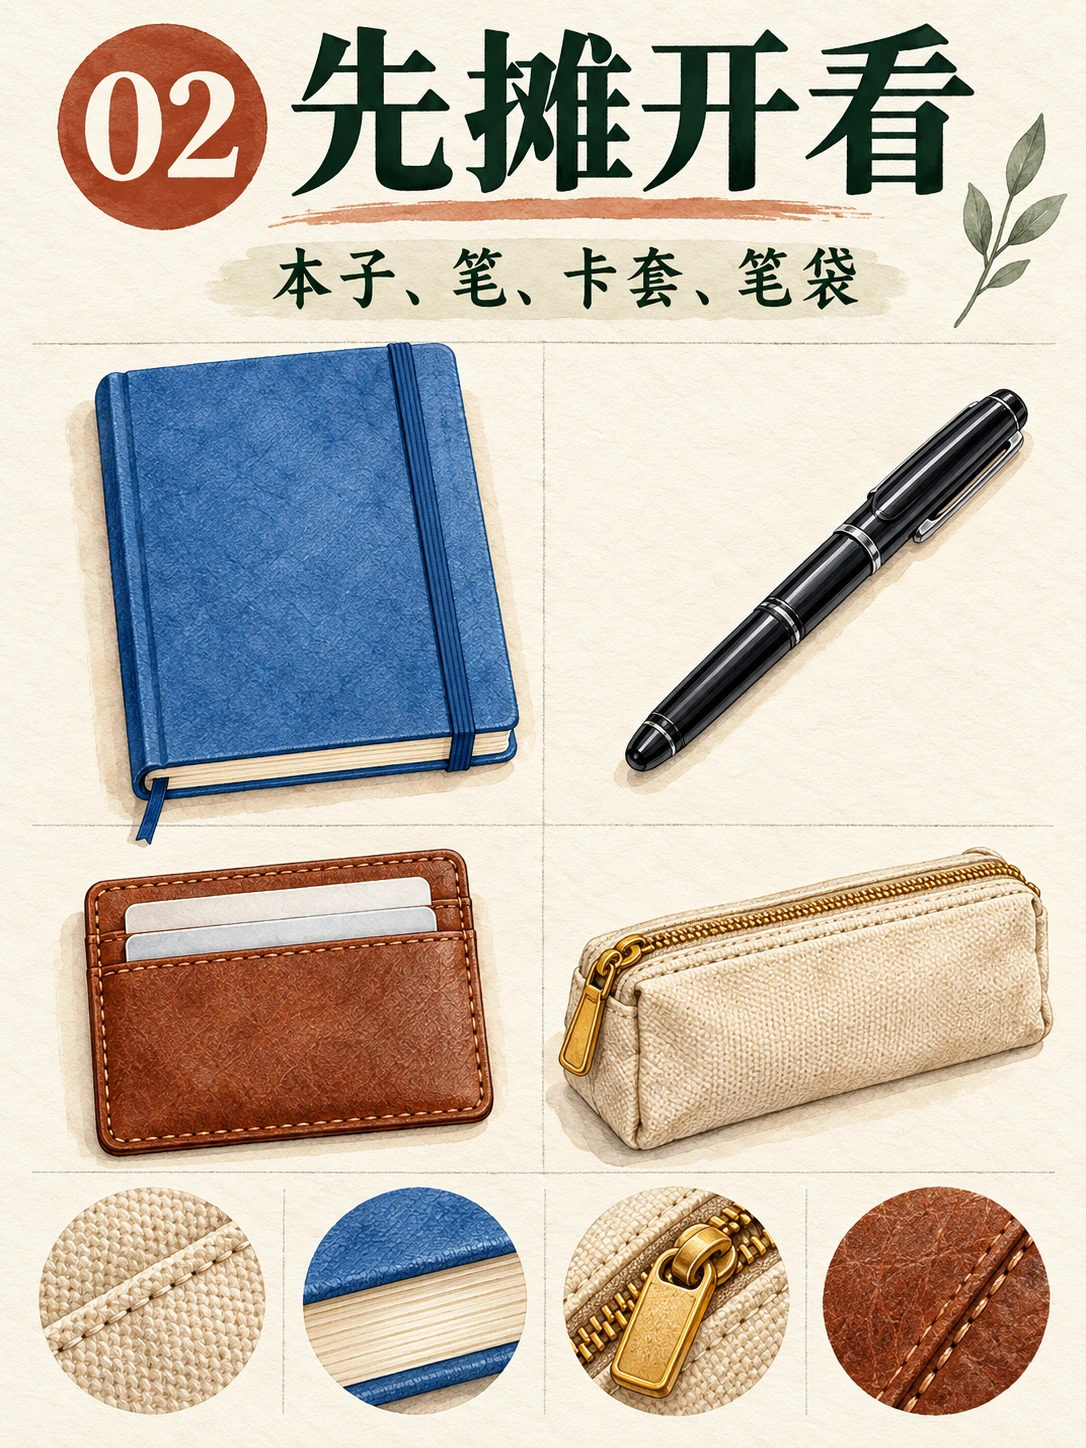
Codex-generated teaching page 02. Removing the bag from this view makes the four contents easier to identify.
Compare the notebook, pen, cardholder, and pouch with Page 01. A different arrangement is expected; a different object design is not.
Page 03: show the pen’s destination
Append this brief:
Page number:
03

Heading:
笔和本子先配好

Supporting text:
把笔收入笔袋

Illustration:
Place the blue notebook beside the beige pencil pouch.
Show the pouch open, with exactly one black pen visible inside it.

Do not show another pen outside the pouch.
Do not include the tote or cardholder.
Keep the pouch design consistent with the earlier pages.
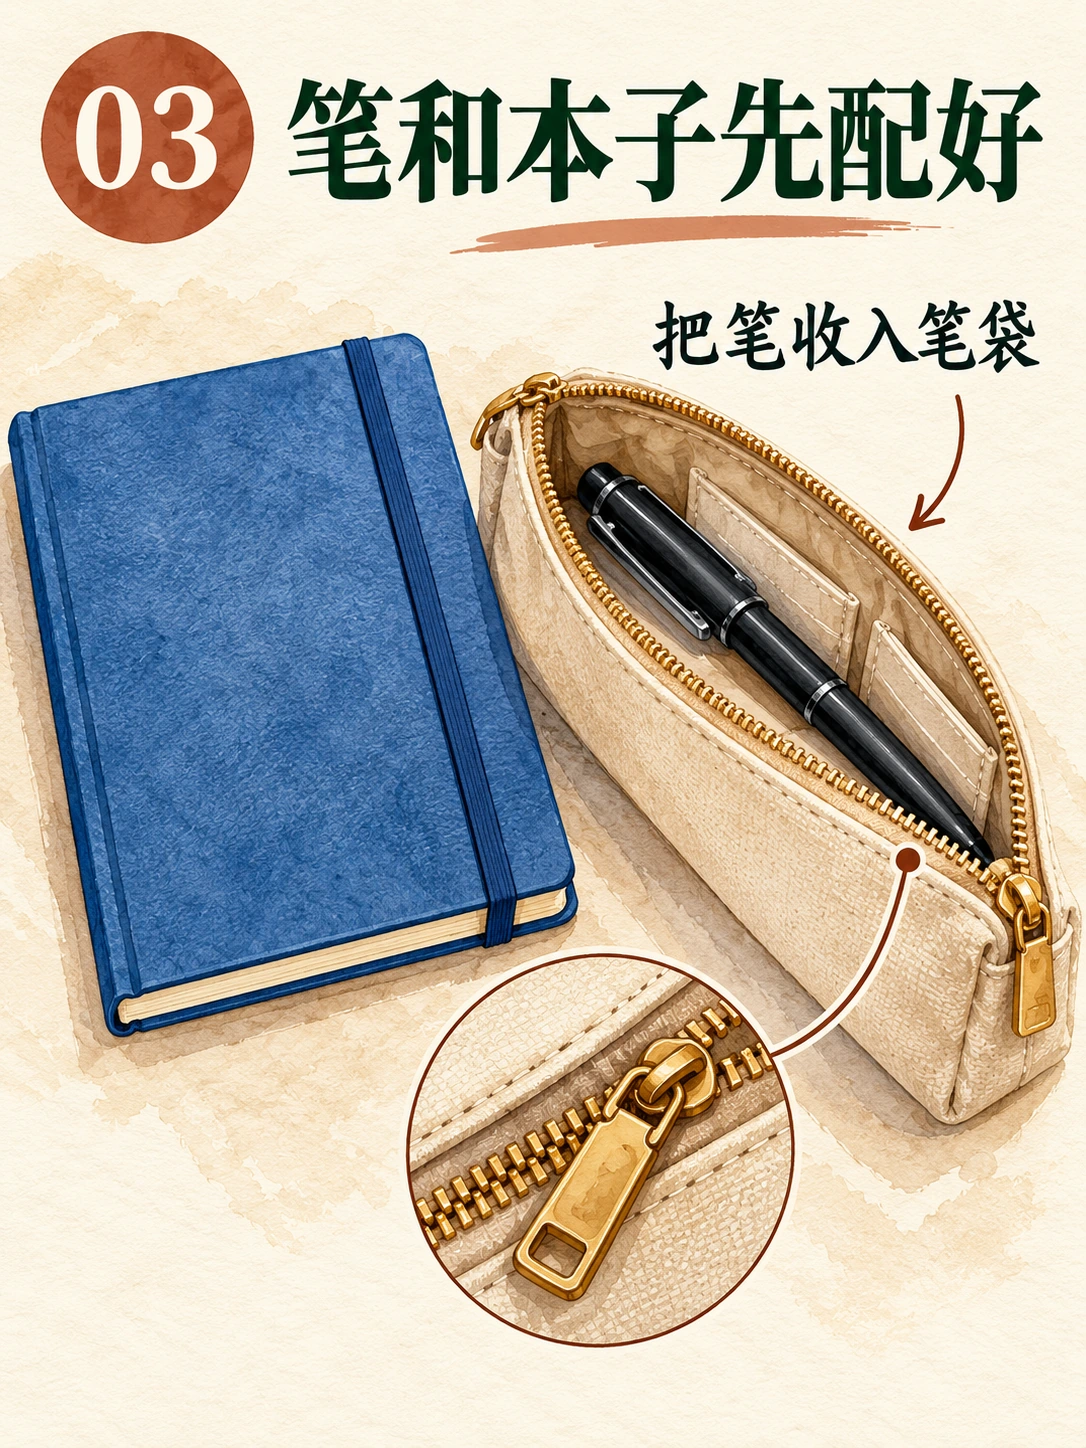
Codex-generated teaching page 03. The pen is inside the open pouch; it is not an additional loose item.
Check that the illustration actually communicates storage. A pen lying beside an empty pouch does not explain the same action.
Page 04: explain the inner pocket
Append this brief:
Page number:
04

Heading:
卡套留在好拿处

Supporting text:
放进内袋,方便取用

Illustration:
Show a close-up of the beige tote's single inner pocket.
Place the plain brown cardholder halfway into that pocket so its location and opening are clear.

The pocket must belong to the same tote, not be a separate pouch.
Do not add extra pockets, readable cards, personal details, or other contents.
The close-up may crop the outer bag where necessary.
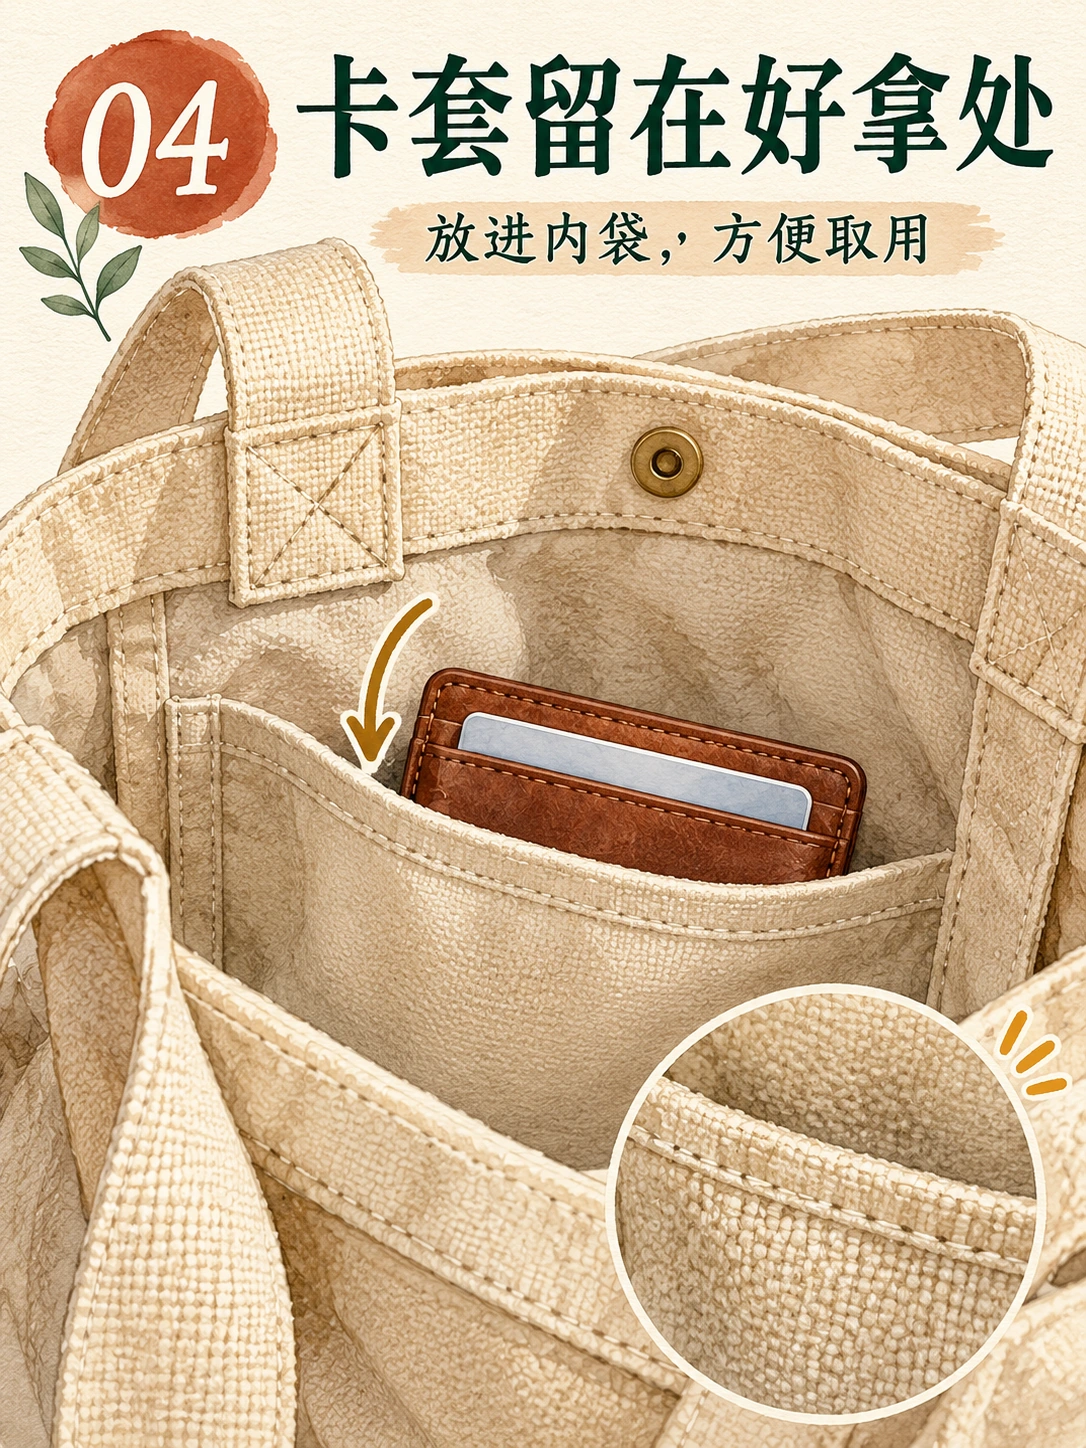
Codex-generated teaching page 04. The close-up identifies the cardholder’s intended storage location.
A close-up may exclude the handles. That alone is not a continuity failure. Check whether the visible pocket belongs to the established bag and whether the cardholder sits inside it rather than floating in front.
Page 05: show the packed state
Append this brief:
Page number:
05

Heading:
装好后的样子

Supporting text:
本子和笔袋放主袋,卡套放内袋

Illustration:
Show the beige tote open enough to inspect its contents.
Place the blue notebook and closed beige pencil pouch in the main compartment.
Place the brown cardholder in the single inner pocket.

The black pen is already inside the closed pencil pouch and must not appear separately.
Do not make the pouch transparent or add a loose pen to display all four items.
Retain the tote's two-handle, one-inner-pocket construction.
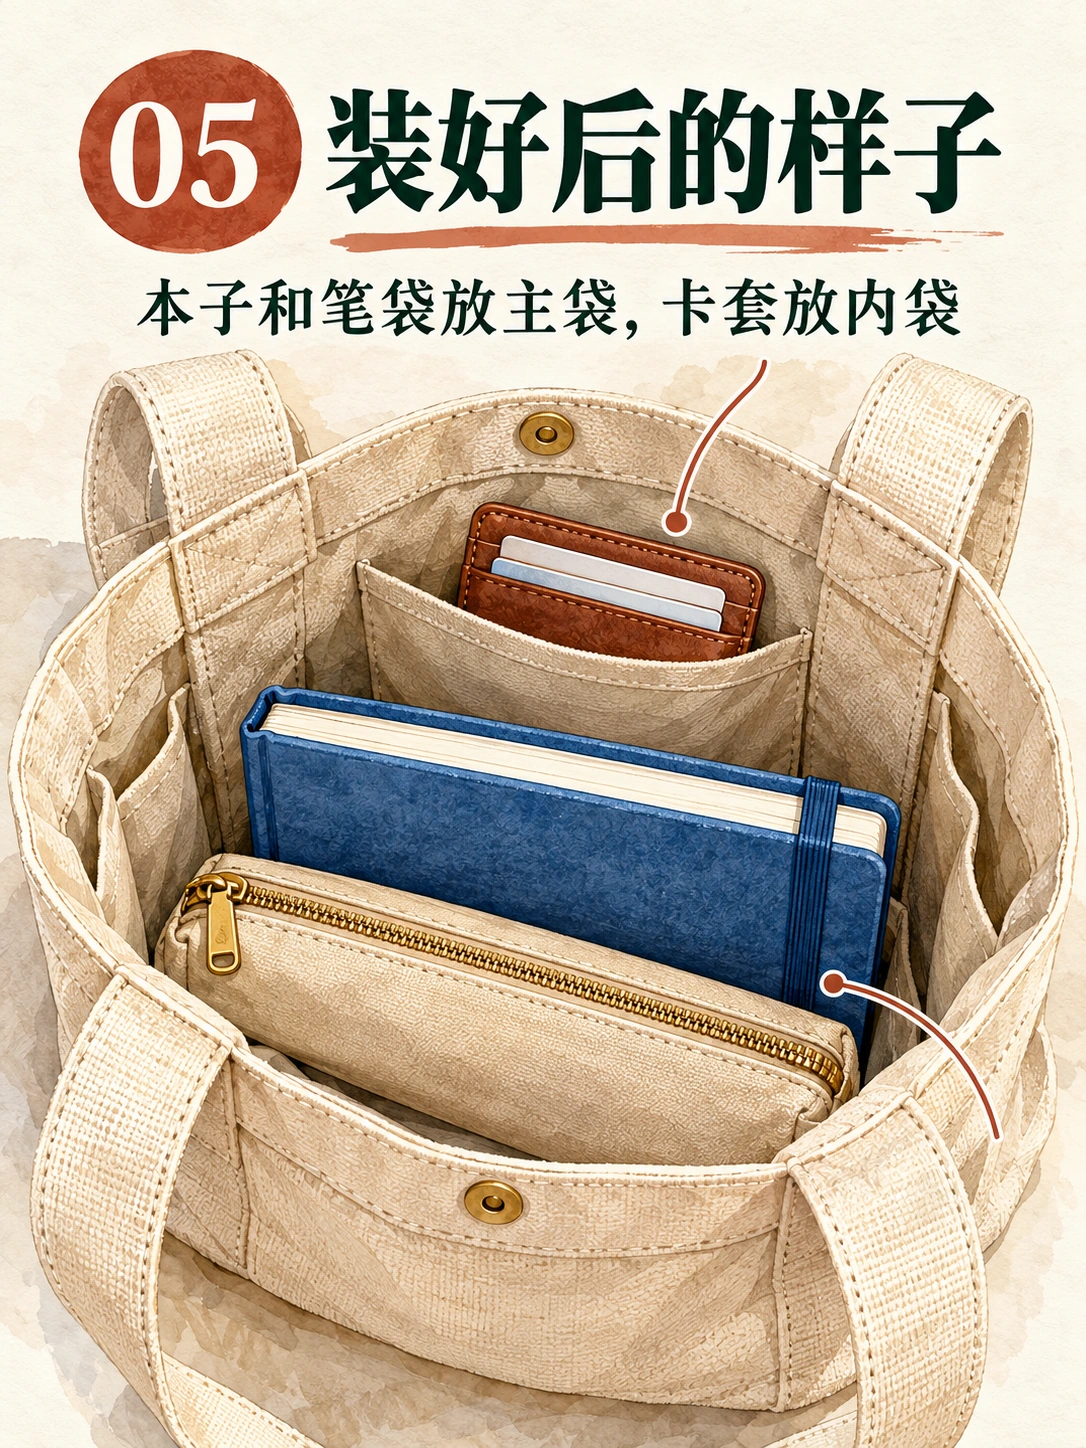
Codex-generated teaching page 05. The pen is represented as packed inside the closed pouch, not duplicated outside it. This is an arrangement illustration, not a capacity test.
The missing visible pen is intentional. Compare Page 05 with Page 03 to understand its state: first shown inside the open pouch, then enclosed when the pouch closes.
Page 06: finish with a usable checklist
Append this brief:
Page number:
06

Heading:
出门前再核对

Checklist labels, in this order:
本子
笔
卡套
笔袋

Footer:
按自己的需要增减

Layout:
Create four clearly separated checklist rows.
Give each row one square checkbox, its exact Chinese label, and one corresponding watercolor illustration.

Use a blue notebook for 本子, a black pen for 笔, a plain brown cardholder for 卡套, and a beige zippered pouch for 笔袋.

This is an inventory reminder, not another packed-bag view.
Do not show the tote or add a fifth row.
Keep the footer readable and inside the page margins.
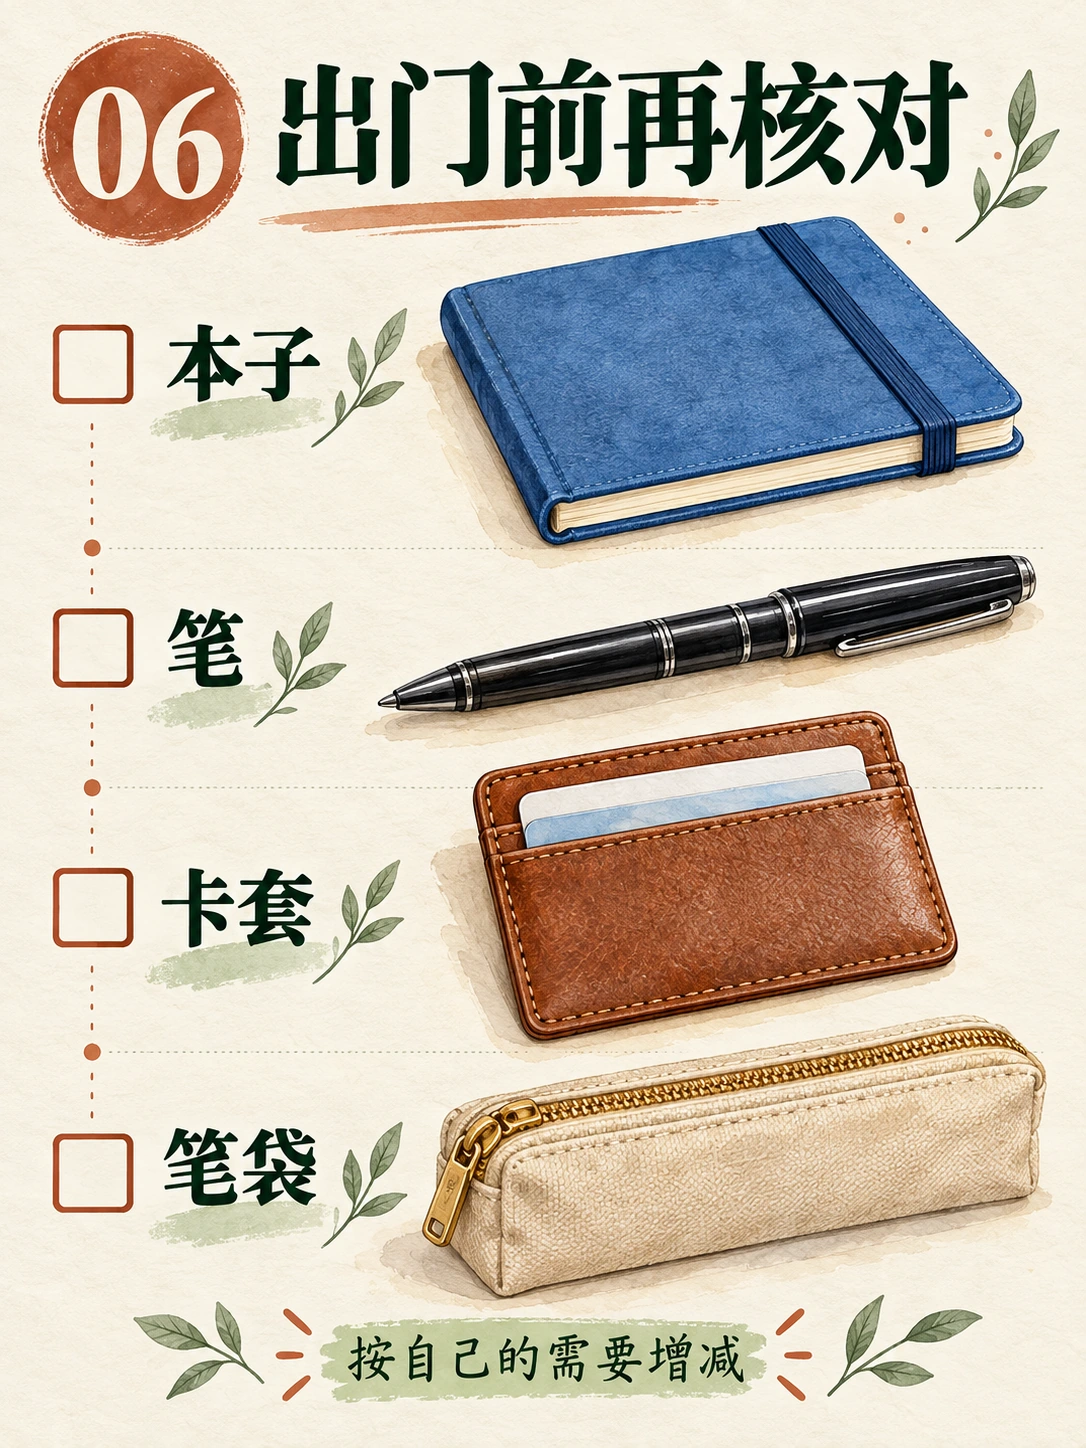
Codex-generated teaching page 06. The separate pen illustration is a checklist symbol, not a claim that a second pen has been packed.
Check the row order, label-to-picture matches, and final line. The footer keeps the example adaptable rather than implying everyone needs exactly the same contents.
5. Use references without assuming the model remembers the series
After choosing an acceptable cover or inventory page, you can switch to Image to Image and carry the chosen objects into the next page.
Upload the actual accepted file and use the shared prompt plus the new page brief. Confirm the settings again. State what the reference controls—object appearance and visual treatment—and what must change: the page’s copy, number, framing, and object state.
For example, Page 02 is useful when preparing Page 03 because it shows the notebook, pen, and pouch separately. Page 04 can help define the inner pocket when preparing Page 05.
Do not merely write “same as the previous page” without supplying the relevant reference. Equally, do not treat a supplied reference as a lock. Compare the new page with the accepted designs.
If an inner pocket or pouch shape has already drifted, return to the last acceptable reference. Reusing the newest image indiscriminately can carry its errors into the rest of the set.
6. Check both individual pages and the sequence
Open the files in order rather than reviewing only a folder of thumbnails.
Content: Does each page perform its planned job? Pages 03 and 04 should explain specific placements, not become another cover showing all four objects.
Object identity: Compare the blue notebook, black pen, brown cardholder, beige pouch, and visible parts of the tote. Look for changed handles, extra pockets, altered closures, or a different bag.
Object state: Count what should be visible on that page. Page 02 shows four loose items; Page 03 shows the pen inside the open pouch; Page 05 should not show it outside the closed pouch. Page 06 uses separate item symbols for a checklist.
Chinese copy and numbering: Compare every character with the page plan. Check punctuation, repeated words, the leading zeros, and whether an earlier page’s heading survived a reference edit.
Margins and reading size: Compare title placement, spacing, and text size across the set. Open each image on a phone at the size you expect readers to see. A line that is legible only when enlarged needs more space or different typography.
The goal is consistency of design and meaning—not identical framing on every page.
Repair the specific failure
| Problem | Next action |
|---|---|
| Page 03 has a pen inside the pouch and another beside it. | Remove the loose duplicate; retain the single pen inside. Recheck the notebook and text afterward. |
| Page 04’s pocket becomes a separate bag. | Return to the accepted tote reference and specify an inner pocket attached to that bag’s lining. |
| Page 05 shows a loose pen outside the closed pouch. | Request removal of that visible pen without changing the packed notebook, pouch, or cardholder. |
| The page number or Chinese text is wrong. | Request the exact replacement. If it remains unreliable, typeset the copy externally. |
| A correction changes previously accepted objects. | Reject that version and return to the saved baseline rather than accepting the new design by accident. |
| Every page looks like a cover. | Return to the page plan and rebuild the missing close-up, packed state, or checklist. |
For the Page 05 pen error, a focused request could be:
Edit the uploaded Page 05.

Remove any loose black pen visible outside the closed beige pencil pouch.
The single pen is already packed inside that pouch; do not reveal it or make the pouch transparent.

Keep the blue notebook and closed pouch in the main compartment, and the brown cardholder in the inner pocket.

Retain the exact text:
装好后的样子
05
本子和笔袋放主袋,卡套放内袋

Preserve the 3:4 layout, bag construction, and watercolor treatment.
Do not add objects or text.
This describes a targeted change, not a protected editing region. Inspect the whole revised page.
Use real text when image editing is not precise enough
A generated JPEG contains pictured lettering, not editable Chinese text fields. Importing it into a design application does not by itself separate the heading, number, and illustration into editable objects.
For persistent errors, remove or cover the incorrect lettering cleanly and add real text in an external editor. Choose a typeface that includes all required characters, then compare the result with the approved copy.
When the original lettering cannot be removed cleanly, rebuild the page using the illustration and a fresh text layout. Keep that editable source for future changes.
7. Assemble six pages externally—not one six-cell poster
Use an external layout document to bring the accepted pages together, align their presentation, and check their order.
You can assemble and reorder pages in Adobe Express. Its documented workflow uses Add page → Same size or Custom size, while View all pages provides page-management actions including reordering and duplication.
Choose one common 3:4 canvas size for the set. Add each accepted image to its own page. Use consistent placement without stretching the artwork or cutting off Chinese text.
If the imported pages are already finished raster images, they remain images. Only text and shapes you rebuild separately become editable elements in that layout.
A six-page document can help with review, but the intended delivery is still six separate image files. One contact sheet containing six miniature pages is not a substitute. This workflow does not depend on automatically splitting a generated collage.
8. Export and verify the actual files
For JPEG exports, use clear filenames such as:
01-cover.jpg
02-inventory.jpg
03-pen-and-notebook.jpg
04-cardholder-pocket.jpg
05-packed-bag.jpg
06-checklist.jpg
Keep the accepted originals and any editable layout source separately. Check that the final folder contains six finished pages, not five pages plus a duplicate candidate.
Open every export. Confirm a common canvas size, correct numbering, complete text, and the intended object states. Review the sequence on a phone as well as on a desktop; smaller supporting lines and checklist labels must remain readable without excessive zooming.
Filename order is an organizational aid, not a guarantee of upload order. Before any later publication, inspect the actual platform preview to confirm page order, cover presentation, cropping, and current upload requirements. Preparing the files does not establish that those checks have already passed.
Keep a plain-text copy of the page plan with the images. Describe the example as an illustrated packing guide, not a personal product review, measured capacity demonstration, or record of a real study session.
The set is ready for that final preview when it contains six distinct, readable pages that move from “what goes in the bag” to “where it goes,” with no unexplained duplicate objects, missing instructions, or mismatched files.
Optional three-step grid workflow, including automatic splitting
The same page plan can be used as plan → generate → split and check. This is a separate route from the six independent images above. EveryGen AI's generation output is still one image; automatic splitting here happens in an external image editor or utility.
- Plan: retain the six approved headings and page numbers. Choose two columns and three rows. To obtain 3:4 portrait cells, the complete grid must have a 1:2 width-to-height ratio.
- Generate: combine the shared style with all six page briefs. Explicitly request six equal cells in row-major order, no outer title, no decorative gaps, and no content crossing cell boundaries. Inspect the actual output; requested geometry is not guaranteed.
- Split and check: open the sheet in an external grid-splitting utility, select two columns and three rows, preview the crop lines, and export all six cells in one operation. Name them 01–06 and inspect every file at full size. If the generated gutters are uneven, adjust the boundaries manually or use the independent-page route.
For example, an exactly aligned 2160 × 4320 sheet would produce six 1080 × 1440 cells. This is a geometry example, not an available EveryGen AI preset or a promise of generated resolution. Splitting does not add detail. A six-cell sheet divides its total pixels among six pages.
The article's landscape cover is a presentation of the six-page concept, with a title and production strip. It is not the equal-cell source to split. Use a dedicated grid output or the six individual teaching pages instead.