 EveryGen AI
GPT-Image-2 Transparent Background Guide: Generate True Alpha-Channel PNGs in One Step
Learn how to remove an image background, verify PNG transparency, and inspect fine edges on light and dark backgrounds.
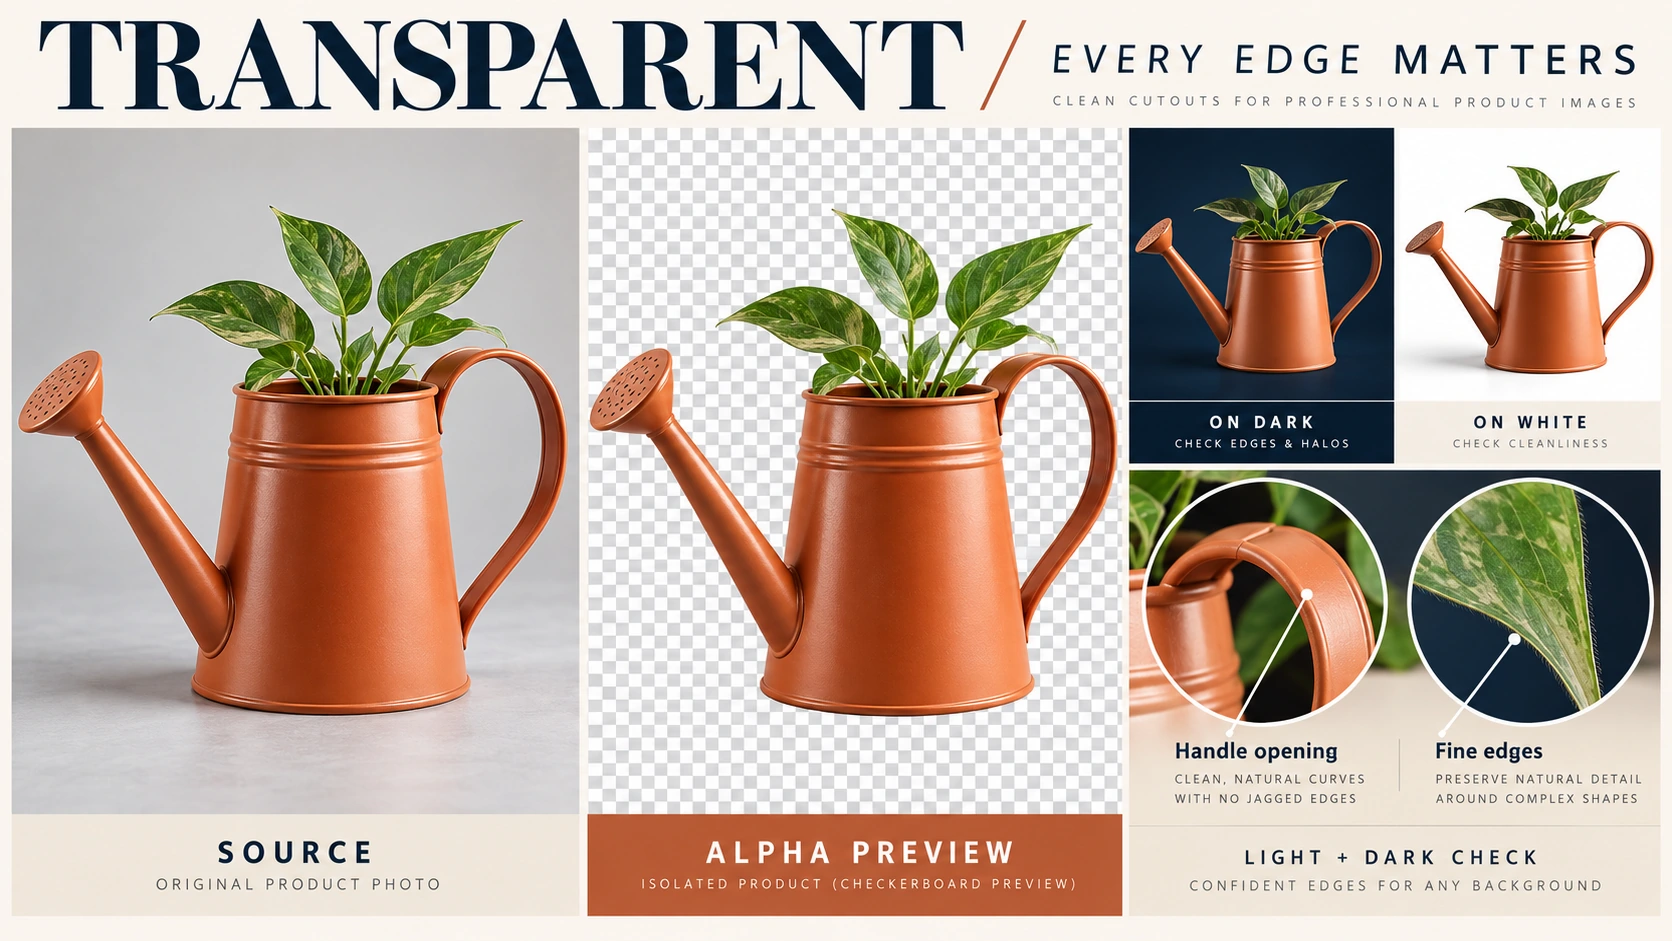
Removing a background is only part of making a usable cutout. The file also needs to preserve the subject, clear the spaces inside it, and look clean when placed over a different background.
This guide uses a watering-can example to explain those checks. The goal is a PNG you can place into a page, presentation, or design—not simply an image that looks transparent in a preview.
Quick path: Keep your original image, remove its background locally in EveryGen AI, and download the PNG. Reopen the downloaded file, place it over light and dark backgrounds, and inspect the handle opening, leaf tips, spout, and outer edges. Repeat the transparency check after any repair, crop, or resize.
What “one step” requires
A direct transparent-background generation needs an output workflow that actually supports transparency and an alpha-capable format. Writing “transparent” in a prompt, receiving a PNG filename, or seeing a checkerboard does not prove that the downloaded background is transparent. If the selected generation interface only offers JPEG or has no transparency control, use the local background-removal workflow below and verify its PNG download. The illustrated previews are opaque teaching graphics, not downloadable alpha-channel examples.
1. Prepare the image and identify what should stay
Start with the clearest original you have, rather than a screenshot of it. Leave enough space around the subject to preserve its full outline, and keep an untouched copy for comparison and repairs.
In this example, the subject is a terracotta-orange watering can with a narrow spout pointing left, a large handle on the right, and a few green leaves emerging from the top.
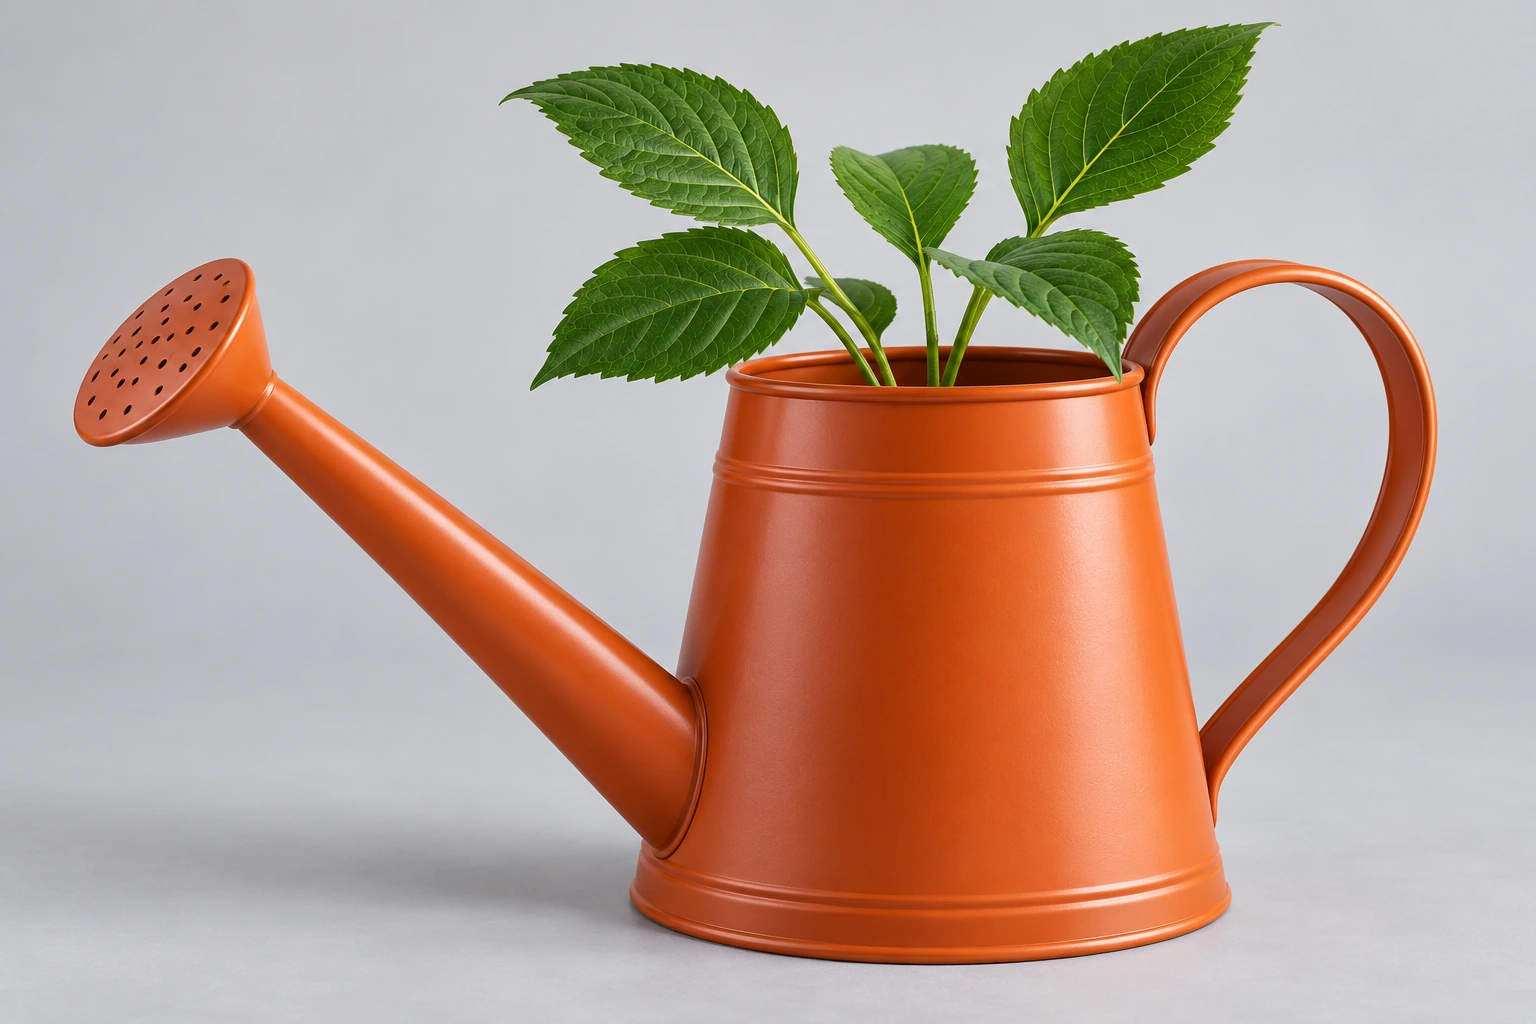
Codex-generated teaching illustration. This image represents the source to be processed; it is not a EveryGen AI background-removal result.
Before processing, identify the important boundaries. The can, spout, handle, and leaves should remain. The light-gray background around them should disappear, including the background visible through the handle opening.
Do not treat every dark area as background. Preserve the can’s shading and any visible interior; an opening through which you can see the background is different from a shadow on the subject.
2. Remove the background and download the PNG
Open EveryGen AI to remove the background from your image. Select your source image, run the local background-removal process, and download the PNG.
Keep this downloaded file separate from the original. For example, use watering-can-source.png for the input and watering-can-cutout.png for the result.
Inspect the actual download in the next step. A screenshot of the preview is not a substitute for the exported file.
Why PNG and alpha do not mean the cutout is finished
PNG supports transparency, but a PNG can also be completely opaque. An alpha channel stores opacity information: pixels can be opaque, partly transparent, or fully transparent. Having that channel does not mean the background pixels have actually become transparent. MDN’s image format guide documents PNG modes with and without alpha, and notes that JPEG does not support an alpha channel.
There are therefore two separate questions:
Is the intended background transparent? A PNG filename—or even the presence of an alpha channel—is not enough to answer this.
Was the right content preserved? A file can have real transparency and still be unusable because a leaf tip is missing, the handle hole remains filled, or a pale border surrounds the can.
GIMP’s guide to saving images with transparency likewise treats checking alpha, removing background content, and exporting PNG as separate tasks. Adding alpha alone is not a background-removal operation.
3. Reopen the downloaded file and change the background underneath it
Use an image editor or design application that lets you place an image above a separate background.
Open a test document, add a solid white background, and place your downloaded PNG above it. Then change the underlying background to dark navy. Keep the PNG itself unchanged.
You are testing whether the new background shows through the intended empty areas—not painting a new color onto the cutout.
For the watering can, check both the space around the subject and the large opening inside the handle. That opening should show white over the white background and navy over the navy background. The solid can body should remain orange.
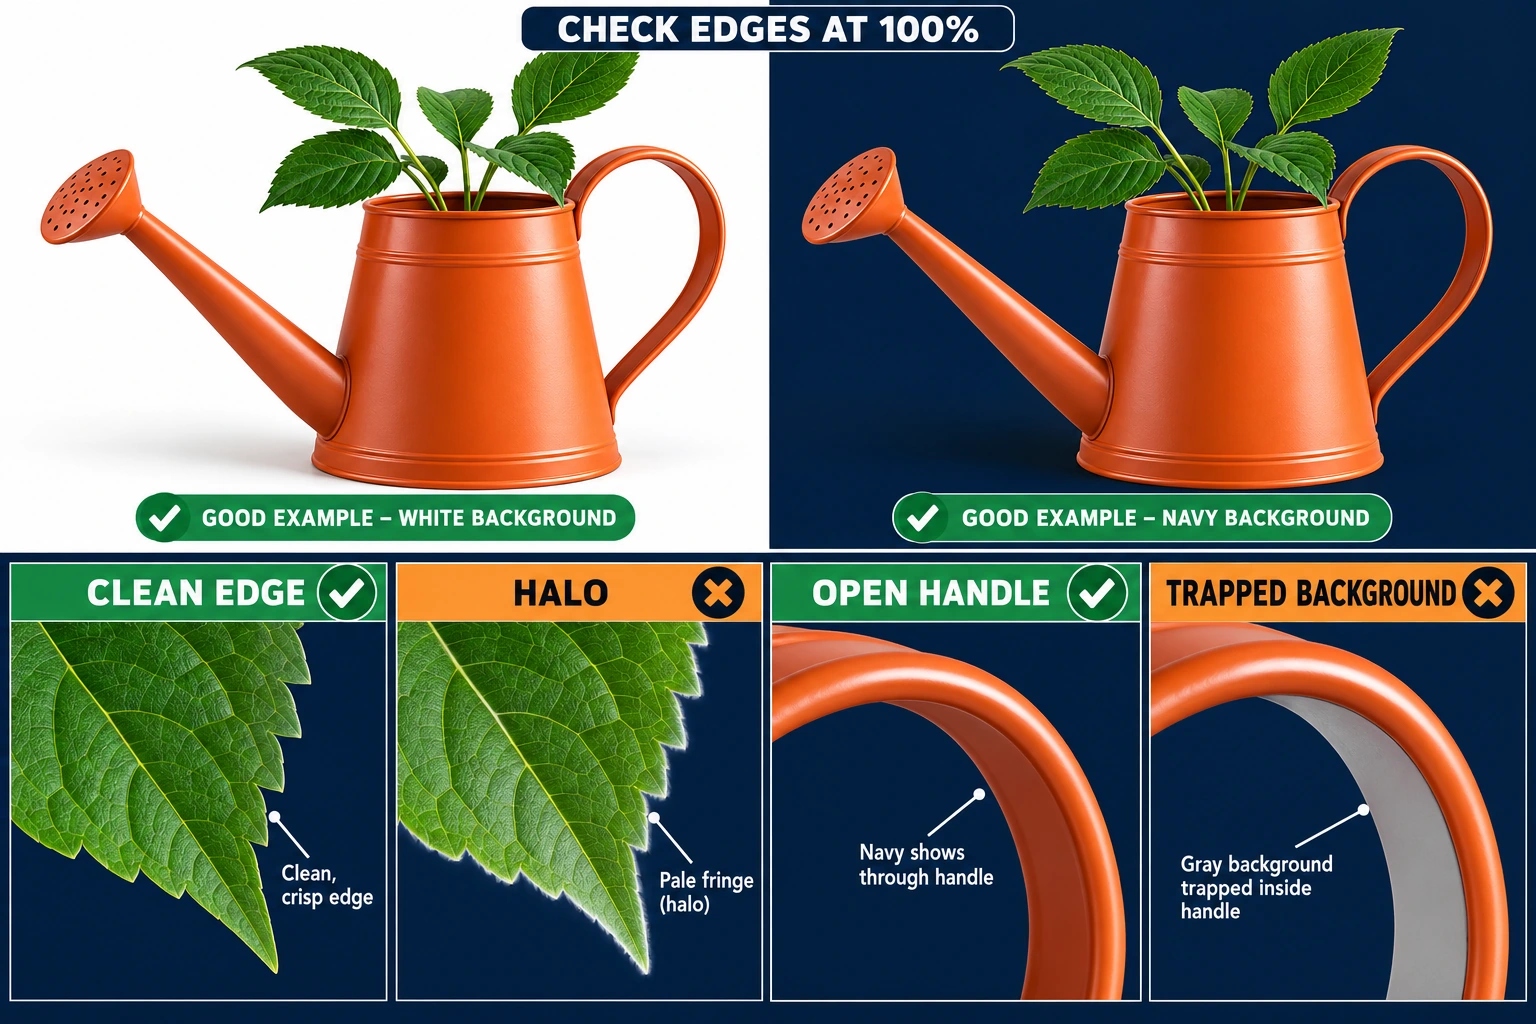
Codex-generated teaching illustration. This is an opaque comparison plate with light/dark previews and enlarged examples of clean edges, halos, clear handle openings, and trapped background. It is not a EveryGen AI output, and the illustration itself is not a transparent-alpha file or a file to use for transparency verification. Run the test on your own downloaded PNG.
A fixed gray or white patch inside the handle is a warning sign: it may be leftover background. A fixed checkerboard pattern that remains visible when you change the layer underneath may also be part of the image rather than a transparency display.
Do not decide from a white preview alone. Test the file over the contrasting background so you can distinguish the application’s canvas from pixels stored in the image.
Keep these inspection backgrounds separate from your deliverable. You need the cutout, not a flattened copy of the cutout on navy.
4. Inspect the small details, then repair the specific problem
Compare the downloaded cutout with the original at 100% zoom. Zoom in further to investigate suspicious edges, then return to the size at which you will actually use the image.
For this example, inspect four areas:
- The handle opening: Check that the background is cleared throughout the opening without cutting into its orange inner rim.
- The leaf tips and gaps: Compare each leaf with the original. Look for missing tips, shortened edges, and background trapped between separate leaves.
- The narrow spout: Follow it to the leftmost tip. Make sure it has not been shortened, detached, or clipped.
- The outer silhouette: Look around the handle, can body, and base for pale borders, stray pixels, or missing pieces.
Treat this as a comparison with the original, not an attempt to make every boundary equally hard. Preserve the shape and edge softness that belong to the source.
Match the repair to the failure
For manual corrections, move to an external image editor with selection and transparency controls. The actions below are external repair routes, not instructions for unverified EveryGen AI buttons.
| What you see | What to do next | What a passing result looks like |
|---|---|---|
| A white, gray, or checkerboard rectangle remains behind the whole subject. | Confirm that you reopened the downloaded cutout, not the original or a screenshot. If the downloaded file is still opaque, return to the original and remove the background in an editor that supports transparent export. Renaming the file is not a repair. | Changing the underlying color changes the intended empty areas. |
| The outside background is gone, but the handle opening remains filled. | In an external editor, select the remaining background inside the opening and make that area transparent. Keep the inner handle edge intact; do not fill the opening with white. | The opening shows the background underneath, with no fixed patch or damaged rim. |
| A leaf tip, part of the spout, or a section of the handle is missing. | Return to the original in an external editor and refine the selection around that detail. Recover the source content rather than trying to invent a replacement from the damaged cutout. | The silhouette matches the original, including thin details. |
| A pale outline appears around the can, especially on navy. | Compare it with the original to distinguish a genuine highlight from unwanted fringe. Use targeted edge cleanup or a defringe operation in an external editor, checking each change before applying more. | No unwanted pale border remains, and the correction has not damaged the subject’s color or outline. |
For the last case, Adobe documents a Photoshop fringe-removal workflow that replaces a specified width of edge pixels. Use that as a targeted cleanup option, not a reason to alter every edge of the image.
Save repairs as a new PNG and repeat the light-and-dark background test. A repair is not finished until the exported file passes, even when the editor preview looks correct.
5. Crop or resize only when the destination requires it
Leave the dimensions alone when the cutout already fits its intended use.
When excess empty space makes the subject difficult to position, you can trim the empty margins. Leave room around the left-facing spout, right-hand handle, and highest leaf tips. Do not crop through a soft edge just to make the bounding box tighter.
When your page or design requires a particular pixel size, you can set the final image dimensions. Keep the original proportions unless you deliberately want to distort the subject.
After either operation, reopen the new export and check transparency again. Do not assume a crop or resize tool preserves alpha simply because the input was transparent or the output filename ends in .png.
If the new export has a solid background, return to the last verified transparent file and use a workflow that preserves transparency. Do not repeatedly process the flattened version.
Also repeat the edge check at the final display size. Verify that the handle opening is still clear and the leaf tips and spout still read correctly.
Before you deliver the PNG
Check the exact file you intend to send or place in your layout—not an earlier version.
Transparency: The surrounding background and handle opening reveal the layer underneath. There is no fixed white, gray, or checkerboard patch.
Subject integrity: The can body remains intact, and the handle, spout, and leaves match the original.
Edge quality: Light and dark backgrounds reveal no unwanted fringe, trapped background, or isolated remnants. The image also looks acceptable at its intended display size.
Final export: The dimensions and crop fit the destination. The file passes the same checks after its last repair, crop, or resize, and no inspection background has been included in the export.
Keep the untouched original and the verified transparent PNG. The finished asset is the file that passes these checks—not merely the first file labeled PNG.